Do you ever wonder how some people manage to maintain an absolutely flawless house, yet you never see them cleaning? This is because they do not attack the house in one sitting. Most of the time, they have a home cleaning checklist.
A cleaning checklist gives you a system that enables you to continually keep your house in tip-top shape without feeling like you are running around like a headless chicken.
Four Reasons to Maintain a Home Cleaning Checklist
- When you have a house cleaning checklist, you can prioritize what needs to be cleaned, and when you need to clean it. This makes it easier to handle different tasks. By breaking down your cleaning chores, you accomplish more than trying to tackle everything at once.
- Sometimes, the people living with you may not ‘see’ what needs to be cleaned. Having a cleaning to-do list also helps you to delegate duties as everyone will know what is expected of them.
- Consistent cleaning will prevent clutter and make your house safer. Routine house sanitization and disinfection prevents the spread of germs. Dust is less likely to build up, reducing the chances of allergic reactions and respiratory diseases.
- A home cleaning schedule can save you from the embarrassment of a messy house, especially when you have unexpected visitors. It is not a nice feeling to apologize for the ‘state of the house’ when company just drops in.
Basic Cleaning Equipment
Before you begin spring cleaning your home, you will need some products and equipment to help you get the job done right. No, you don’t require a hotel housekeeping trolley, but there are some necessary cleaning supplies you would need to stock up on if you don’t already have them. These include:
- Microfiber cloths or disposable rags
- Scrub brush, scrub sponges and abrasive scrub pads
- Mop and bucket
- Extendable duster
- Toilet brush
- Grout brush or an old toothbrush
- Lightweight vacuum
- Rubber gloves
- Indoor broom (if you have a balcony or patio, have a separate broom for that area)
- Dustpan
- Squeegee
- Plunger
- Stovetop scraper – only for flat-glass ceramic cooktops
Cleaning Products You Can Purchase for Your Home:
- All-purpose cleaner – these are generally mild solutions used to remove grease and dirt. They can be used on a variety of surfaces such as stovetops, countertops, and sinks. It is good to note that all-purpose cleaners are not disinfectants.
- Disinfectant – This is essential for the kitchen and bathrooms. These should be left on the surfaces for at least 5 minutes before wiping them off to kill germs.
- Tile and grout cleaners – Scrub free solutions are the better option for shower tiles and bathtubs as they will not eat through the enamel.
- Wood cleaner – This should match the type of wood you have in your house to maintain its appearance.
- Glass cleaner – A no-streak or streak-free glass cleaner will give you the best results.
If you are not a big believer in commercial cleaning products, there are several things around the house that can be substituted for cleaning supplies.
The Best Way to Maintain a Clean House
It may sound like a daunting task, but a daily home cleaning routine will ensure that you are not living in a never-ending mess. This little known secret to keeping a clean home goes a long way. When you get into a daily cleaning routine, you will find that it takes just about 15 minutes a day to get your house in order.
Before we get into the daily cleaning checklist, there are a few tidy habits you could start on:
- Make your bed as soon as you get out of it.
- When you take off your clothes, either hang them if they are still clean or drop them in a laundry hamper.
- Try your best not to leave dirty dishes in the sink before you go to bed.
- Use wet wipes to clean bathroom counters and sinks after use.
- Keep kitchen counters free from appliances to make wiping down easy.
- Teach kids to put away their toys before they go to bed.
- Squeegee the glass walls after a shower to prevent stains.
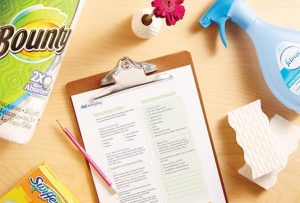
Daily cleaning checklist
Your daily cleaning schedule should tackle the areas in your home with the most traffic. This includes the living room, kitchen, and bathrooms.
Kitchen:
- After your last meal, load dirty dishes into the dishwasher.
- Use an all-purpose cleaner to wipe down kitchen counters, dining table, and food preparation surfaces.
- Sweep and mop dirty floors.
- Clean the coffee maker.
Rooms:
- Straighten up the living room – fold blankets, tidy up remotes, magazines, or paperwork.
- Wipe down tables in the living room, playroom, or home office.
- Make beds and collect dirty laundry.
Bathrooms:
- Wipe down the exterior toilet, sink, and bathroom surfaces.
- Squeegee shower walls.
- Fold or hang towels.
Weekly cleaning checklist:
Having a weekly home cleaning checklist can help you knock down one household task every day. This way, you do not get overwhelmed by a load of laundry or a messy kitchen.
Mop up Mondays
After all the weekend activities, you would like to start the week with a clean home. Dedicate Mondays to moping and vacuuming:
- the entrance hallway
- family room
- stairs
- corridors
- bedrooms
- bathrooms
- kitchen
Be sure to go under the dining table to collect any crumbs that may have fallen there. Keep this weekly mop up to areas that can be easily accessed.
Scrub down Tuesdays
A day of pulling out those gloves and dealing with the bathrooms.
- Scrub and sanitize the toilets, bathtubs, showers, sinks, and counters.
- Plastic shower curtains and bathmats can be sprayed with disinfectant.
- Change towels and do an inventory of toiletries. You do not want to run out of toilet paper.
Wipe away Wednesdays
- Using an all-purpose cleaner and microfiber cloth, wipe away any dirt or smudge from the kitchen sink, stovetops, faucets, counters, and backsplash.
- Wipe down the exterior surfaces of the microwave, oven, coffee maker, toaster, fridge, blender, mixer, and other kitchen appliances.
- Dust and wipe furniture; lamps and lampshades, picture frames, windowsills, doorknobs, light fixtures, ceiling fans, and vents.
- Wipe the TV, entertainment system, and remote controls.
- Dust off cobwebs and clean mirrors.
Throw out Thursdays
Organize your home by getting rid of unwanted, outdated, or expired items. You can start with the fridge and move on to the medicine cabinet. Throw away junk mail, newspapers, old make-up, and lotions. Chuck out clothes with holes that you know you will not mend or craft projects from 10 years ago.
If you have not used something in your house for the past two years, then there is the likelihood that you will not use it this year. Ridding your house of old, unused items every week will not only create space for other important things, but decluttering also gives you peace of mind.
Fold it up Fridays
As the week comes to an end, the laundry basket should have filled up pretty well. Friday is a good laundry day.
- Soak your whites separately as well as clothes with tough stains.
- Strip the sheets, pillowcases, tablecloths, kitchen, hand, and bath towels and throw them in the washing machine.
- Fold, iron, and put away clean laundry.
Pet-friendly Saturdays
If you have furry friends in your household, you can make use of Saturday mornings to show their living spaces some love. Empty the kitty litter box and scrub it with soap and water. Do not use any chemical cleaners such as bleach or ammonia because certain chemicals can be harmful to cats. Felines are also very picky and sensitive to smells. Any chemical odor may make a fussy cat have a bathroom break on your freshly cleaned carpet.
Saturday’s are also a great day to change the bedding for dogs and caged animals. If you have fish, doing a partial water change for the aquarium will keep them swimming happily.
By following this weekly home cleaning checklist, your weekend should be free to enjoy with friends and family in a squeaky-clean home.
Three Months Spring-Cleaning Checklist
Every three months, we recommend that you set some time aside for a thorough, top to bottom, house spring cleaning. Understanding that not everyone can spring-clean like maid service, we suggest that you dedicate a specific section of the house for this particular task. You can work through the kitchen at one time, the living room, and bedrooms the next time and attack the bathroom last, then rotate. This way, you will not get tied down cleaning up for hours, and you can concentrate your effort on one cleaning duty.
Kitchen checklist
Refrigerator
Clear out your kitchen area because you will need space.
- Take out everything from the fridge first. This includes the shelves and drawers and wash them in dishwashing liquid and warm water. Rinse and wipe dry.
- Using a microfiber cloth dipped in warm water and baking soda, wipe inside the walls and floor of the refrigerator, as well as the top and outside. You can use a stainless-steel cleaner if that is what your fridge door is made of.
Food inventory
- Take an inventory of items that need to be eaten soon, thrown out, or restocked before putting things back in the fridge. Do this with food in the freezer as well as the pantry.
Oven
- Using an oven cleaner and a cloth, wipe away any grease, grime, residue, or crusts from the door and inside the oven.
- Clean the rangehood to remove any grease as this can be a fire hazard.
- Clean the oven racks in dishwashing soap and hot water.
It is good to note that oven cleaners contain harsh chemicals that can irritate. You should protect your hands with a pair of gloves and safety glasses for your eyes.
Microwave
- Clean the inside of the microwave by mixing a quarter cup of vinegar with one cup of water and boiling it in the microwave for 3 minutes. When the walls are all steamed up, wipe them with a clean cloth.
Dishwasher
- If you start to smell something foul coming from the dishwasher, put one cup of vinegar and another bowl with baking soda on the top rack, and run a normal cycle.
Living room and bedroom checklist
Check out the recent Redfin article we were featured in:
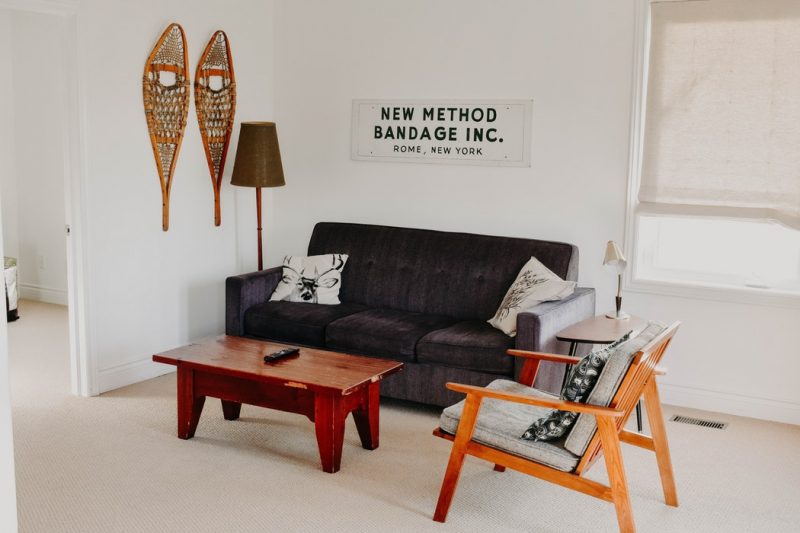
The Complete Living Room Cleaning Checklist
The living room is one of the most important rooms in the house. It’s where you relax, entertain guests, and spend time with your family. However, because people use it so much, it can be one of the most challenging rooms to keep clean. This is especially true if space is limited, like in a small apartment in San Francisco, CA, or a condo in Seattle, WA. From dusting to vacuuming to deep cleaning, there’s a lot to do to keep your living room looking its best.
- Vacuum all carpeting, upholstery, and area rugs. Don’t forget to get behind large pieces of furniture and under couch cushions.
- Take down and wash curtains, drapes, duvets, comforters, pillows, and cushion cover
- Dust and wipe down window blinds, windowsills, air vents, doors, walls, and molding
- Use a glass cleaner on the windows and glass cabinets
- Dust the smoke alarm and check the batteries
- Change your air conditioning and vacuum filters
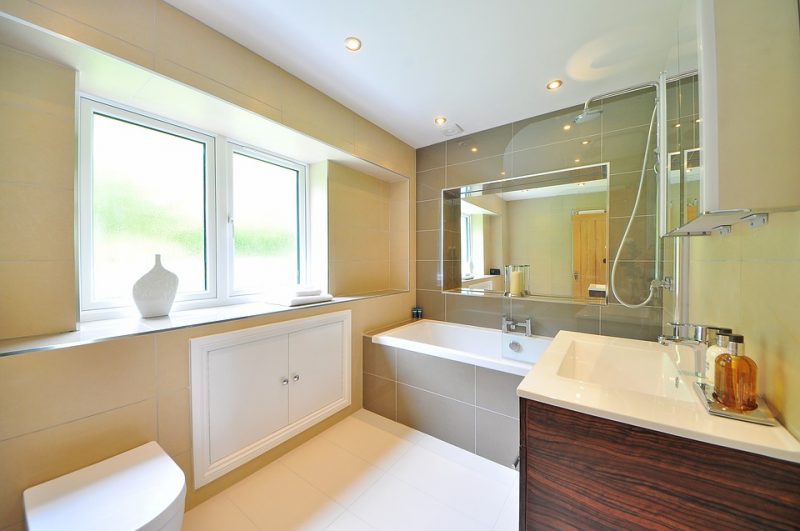
Sparkling bathroom cleaning checklist
If not well looked after, your bathroom can become a good host for nasty fungi. Mildew and mold thrive in dark and damp environments. Discourage unwanted bathroom guests with these bathroom cleaning hacks.
- Clean and disinfect the trash can with a cleaner that can kill bacteria and neutralize odors. Rinse it and let it air dry in the sun to prevent mold.
- Disinfect the toothbrush holder – most of them are dishwasher friendly.
- Check the label on your shower curtain or liner and see if it can be run in the washing machine. For plastic shower curtains, you can soak them in water and vinegar and hang them out to dry. If the time has taken its toll, replace your shower curtain.
- Wipe or vacuum the inside of drawers and cupboards. Put new lining in drawers.
Shine your porcelain throne both inside and out
Using a disinfecting spray, spritz the entire toilet, inside, outside, at the back of the base, under the seat, and the wall behind. Let the cleaner do its magic for at least 5 minutes. Wipe the exterior of the toilet from top to bottom with a paper towel. Use a stiff-bristled toilet brush to scrub under the rim and inside the toilet. Flush to rinse.
Annual house cleaning checklist
Good news – there are some areas of the house that can remain overlooked for a year. Having said this, you still need to have a go at them as they are essential for the overall upkeep of your home.
- Clean and organize the garage and basement.
- Clear out gutters.
- Clear out chimney and fireplace.
- Special projects – Declutter, donate or sell any clothes, shoes, toys, sporting equipment, gadgets, or things you have stored in the house that you have not used in the past year.
When to call the experts
Starting a home cleaning routine when your house is already ‘too far gone’ can seem hopeless. Spekless House Cleaning is here to help. In just 60 seconds, you can book a quality cleaning appointment through our online and digital communication platform.
You can choose whether you would like a standard cleaning to get you started on your way to maintaining a home cleaning checklist, or you prefer a deep cleaning where we get under every nook and cranny. We can help you create a house cleaning schedule and checklist that will work around your needs.
We’ve got your back, so you don’t break yours while trying to keep a clean home.
The kitchen
Everyone room on your move-out cleaning checklist should finish with you cleaning the floors. The floors are the very last thing you should do in each room before heading to the next. And they should only be done after you’ve got everything completely moved out of that space.
The bathrooms
If you have any countertops or a vanity in your bathroom be sure to clean out the drawers in them (like we did in the kitchen) and give them a nice wipe down using our all-natural cleaning solution. Dust off any framing on these structures and wipe down the mirrors before calling them complete.
General living spaces/Bedrooms
Light fixtures
Make sure you check all ceiling fans and permanent light fixtures for debris or dust. These should be the first things that you clean in each room since they’re dusty. Clean these fixtures before cleaning the surfaces (countertops, appliances) and floors.
Every room should be checked for baseboards that need to be cleaned. Be sure to go around and clean these before you clean the floors and after you dust in each room.
You don’t need to get out the surface cleaner and scrub your walls clean but you do need to make sure there are no visible marks on them. Go around and look for holes in the wall or marks that need to be covered up. Get rid of any dust and cover up any marks with touch-up paint.
Living room cleaning checklist
1. Declutter
To start off your living room cleaning checklist, the first thing you’ll do is go through and declutter your living room. Make sure the space is free and clear and easily accessible.
2. Dust
Now go through and dust everything using a cleaning cloth and a dusting spray. For high places, you can use a hand duster. And for the blinds, you can use either a hand duster or the brush attachment on your vacuum cleaner.
3. Sanitize
Once you’re done dusting the entire living room you can start to sanitize any surfaces that need to be disinfected. Surfaces include but are not limited to any remote controls, buttons on the entertainment system, a home telephone, and any handles on drawers or doors.
4. Upholstery
After you’ve sanitized everything now you can go through and clean all of your upholstery. Start by vacuuming the surface using the brush attachment on your vacuum. And if you have any covers on your upholstery you can go ahead and throw them in the washing machine. After you’ve vacuumed the surface you can wipe it down with a damp cleaning cloth or by using the recommended cleaning regime specified by the manufacturer.
5. Shelving
If you have any shelves or drawers in your living room nows the time to clean them out. Wipe down any shelves and pull everything out of the drawers before wiping them down as well. Just take your cleaning cloth and spray it with antibacterial dusting spray before wiping down the surface.
6. Windows
Now it’s time to break out the window cleaner and your microfiber cleaning cloth and clean all the windows in your living room. For this step, you could also go the old fashion route and use newspaper if you don’t have a microfiber rag.
7. Floors
The last thing for you to do in this living room cleaning checklist is to sweep, vacuum, and mop the floors (if applicable). Once you’re done with that you can kick your feet back and relax. You deserve it!
For more living room cleaning tips, check out this post.
Overview
Here’s what you’ll need:
After you’ve removed all or any bath mats or rugs from the bathroom you can start your cleaning checklist by emptying the trash. This is also when you’ll want to remove any dirty laundry and anything on the countertops.
Next, take your duster and work from top to bottom dusting the entire bathroom. Dust any light fixtures, the top of the medicine cabinet, the back of the toilet, etc.
Now spray everything down with your bathroom cleaner slash disinfectant. This is your tub, sinks, toilet, and counterspace. It’s also a good idea to spray your trash can down too. They can get a little dirty sometimes. Once you’ve sprayed them, let the solution sit for at least two minutes before moving on to the next step.
Taking your microfiber cloth, wipe down all surfaces you just sprayed. If your bathtub needs a little TLC, take your bathroom cleaner and spray it again and then use your sponge to help remove some of the soap scum and grime from it. Once that’s done you can take your glass cleaner and a clean microfiber cloth and wipe down the mirror before heading to the last step.
Pro Tip: After you’ve wiped down your surfaces take a dry microfiber cloth to buff and shine the surfaces.
Finish up your bathroom cleaning checklist by vacuuming and mopping your floors from the inner corner out. It’s best to use a microfiber mop on the bathroom floor to really make it shine.
Although your new place should be sparking in its glory, don’t assume that will always be the case. We recommend a move in cleaning
Are you anticipating a move in-move out the near future? Let our
Spring cleaning differs from regular or routine cleaning in the sense that it can take a lot longer. Most people designate a week or two to spring cleaning so they can clean, declutter, and do their yearly chores all at the same time. So if you don’t know where to begin with your spring cleaning, don’t worry you’re not alone!
Over the next couple of weeks, we are going to walk you through each week of Spring cleaning. The checklist we have created will walk you through each day of cleaning and decluttering your home. It will help you stay motivated, inspired, and the best part is that you can use it for other seasons too.
Day 1: Dusting
- Vacuum window screens